Chocolate Layer Cake

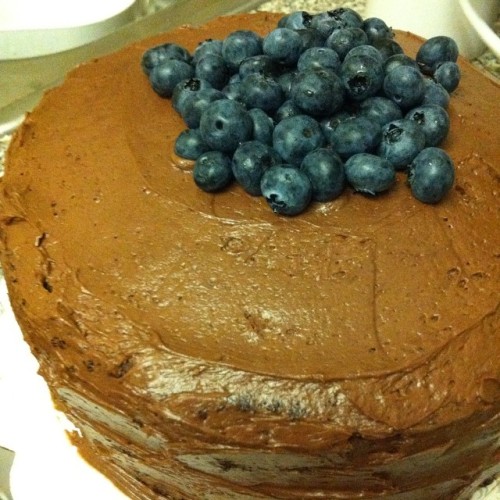
chocolate layer cakeI’m finally back to my blog. It’s been too long since the last time I updated it. I’ve actually been cooking and baking here and there, but didn’t really update anything onto the blog. I know, I need to come back and update more often! Anyways, I’m back this time for my chocolate layer cake that I made for my best friend’s birthday a couple weeks ago.

Honestly, this is actually a very simple and yummy recipe. The cake also came out tasty, moist and chocolaty. The only problem I have is to frost the cake! Frosting a cake is definitely something that I need to work on more. It’s true that it doesn’t matter if it doesn’t look good, as long as it tastes good. However, I want to frost it evenly and smoothly. I want it to look perfect, so I went on Youtube and learned how people frost the cake. This is what I’ve learned – frost the first layer and let it chill in fridge until cream is set. Then, frost a second layer with the right tools to even out the cream. This sounds easy, doesn’t it?! That also means I might need to invest more tools just for this?! Hmmmm….

Ingredients for 2 layers cake:

1. 1/2 cup of all purpose flour

2. 1 cup of cake flour

3. 1 cup of unsweetened cocoa powder

4. 1 1/2 teaspoon of baking soda

5. 1 1/2 teaspoon of baking powder

6. 1 teaspoon of salt

7. 2 eggs, at room temperature

8. 3/4 cup of buttermilk

9. 1/4 cup of plain Greek yogurt

10. 1/2 cup of vegetable oil

11. 1 tablespoon of vanilla extract

12. 3/4 cup of strong brewed coffee, hot

13. Fruits (optional)

Ingredients for Whipped Chocolate Buttercream:

1. 3 sticks of butter, softened

2. 2 cups of powdered sugar

3. 3/4 cup of unsweetened cocoa powder

4. 2 teaspoons of vanilla extract

5. 4-5 tablespoons of heavy cream

Directions:

1. Preheat oven to 350F. Spray two 9″ cake pans with cooking spray. Line with parchment paper at the bottom of the pans, then spray cooking spray over it.

2. Sift together flour, sugar, cocoa powder, baking soda, baking powder and salt in a bowl and set aside.

3. Beat together eggs, yogurt, oil and vanilla extract until smooth. Slowly add half of the dry ingredients alternating with buttermilk until combined. Add hot coffee. Evenly pour into the cake pans and bake for 20-25 minutes, or when toothpick inserted comes out clean.

4. Remove cakes from oven and let cool completely.

5. For frosting: Add butter and powdered sugar beat until light and fluffy, about 4 minutes. Add cocoa powder and vanilla extract. Add heavy cream and beat until light and fluffy.

6. Once cakes are cooled completely, remove from pans. If the cakes come out in domed shape, make sure to evenly slice out the top to make level. Place one layer, flat side up, on a plate or cake board. With a knife or offset spatula, spread the top with frosting, add sliced strawberries if desired. Place the second layer on top, and spread the frosting evenly on the top and sides of the cake. Decorate with blueberries or any kind of desired fruits.

Serradura (Sawdust Pudding – 木糠布丁)

Image

Happy New Year! First post of 2014! Serradura, also known as Macau Sawdust Pudding (木糠布丁). It’s a Portuguese dessert consisting of sweet cream and biscuits crumbs.

I’ve been having some craves over puddings lately ever since I made the green tea pudding last month, or a couple months ago. The fact that I didn’t even remember when was the last time I made something at home shows how long I have not been updating my blog.

Serradura, I actually never had serradura before until a few months ago, my roommate bought one home from a Chinese dessert place in Brooklyn. I think that’s the only place has serradura, and it’s quite far for me to go all the way there just for dessert, so I tried making it at home. I’m not sure if it tastes authentic since I never got to try the real serradura or even tastes like the one from that dessert place, but it’s actually pretty good, even my pig said so!

Serradura is very easy to make. You only need 4 ingredients to turn them into a beautiful and yummy dessert.

Ingredients:

~ 2 cups of heavy whipping cream

~ 30 Marie biscuits

~ 2/3 to 1/2 cup of sweetened condensed milk

~ 1/2 teaspoon of vanilla extract

Directions:

~ Using a food processor to crush the biscuits until very fine. If you don’t have a food processor, like me, you can place the biscuits in a ziploc bag and use a rolling pin to crush by hands.

~ In a large mixing bowl with a mixer, beat heavy cream until soft peak form. Add vanilla extract and 2/3 cup of condensed milk, and whip until stiff peak form. If it’s not sweet enough, add more of condensed milk until desired sweetness.

~ Use a piping bag to pipe a layer of whipped cream at the bottom of container/glass, and sprinkle some biscuits crumbs over evenly. Repeat with several layers of cream and biscuits crumbs. Finish with crumbs over top of the pudding.

~ Cover containers/glasses of pudding with plastic wrap, and chill for at least 4 hours in refrigerator.

Peach Pie

Image

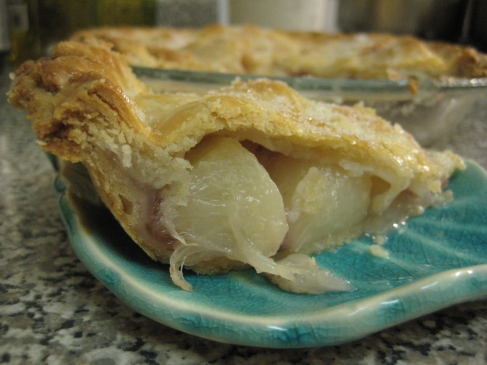
I made a peach pie today simply just because I got left over pie doughs in the freezer from July 4th and a few peaches sitting in the fridge for days that I really just wanted to get rid of them, so why not turning them into a beautiful and delicious peach pie?

Ingredients:

~ Pie Crust:

1. 2 1/2 cups of all purpose flour

2. 1 teaspoon of salt

3. 2 sticks of unsalted butter, cold, cut into small pieces

4. 1/4 cup of ice water, plus more if needed

~ Filling:

1. 1 teaspoon of vanilla extract

2. 1/2 cup of sugar

3. 3 tablespoons of constarch

4. 3 big peaches, peeled, pitted and thickly sliced

5. 2 teaspoons of fresh lemon juice

6. 2 tablespoons of cold unsalted butter, cut into tiny cubes

Directions:

1. Combine flour and salt in a large mixing bowl, then cut in butter and combine with hands or a processor.

2. Slowly add ice water, steady stream, just until dough holds together without being wet or sticky.

3. Turn out dough onto a clean work surface. Divide in half and place each half on a piece of plastic wrap. Shape into flattened discs. Wrap in plastic and refrigerate at least 1 hour or overnight. Dough can be frozen up to 1 month.

4. Unwrap one piece of dough and transfer to a lightly floured work surface. Roll into a 12 inch circle, turning and lifting as you go to ensure dough isn’t sticking. Transfer it to a 9 inch pie plate and gently ease in. Trim overhang to about 1/2 inch and transfer pie plate to refrigerate for 15 minutes.

5. Meanwhile preheat oven to 400 F. In a bowl, combine sugar and cornstarch. In a large bowl, gently toss peaches with lemon juice, vanilla extract and sugar mixture.

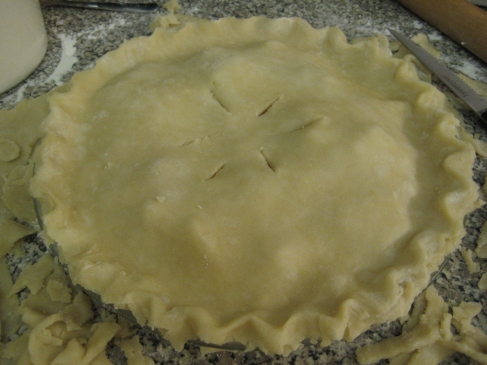
6. Unwrap second disc of dough. Roll into a 12 inch circle. Remove pie plate from fridge and add filling. Scatter cubes of butter over the top. Use fingertip to lightly moisten edge of dough with water. Transfer second piece of dough to cover the filling. Trim slightly, fold top overhang under the bottom, pressing to seal. Flute edges if desired. Cut several vents to allow steam to escape. Then, egg wash the top of the pie.

7. Transfer pie to the center rack of oven. Slide a rimmed baking sheet onto the rack directly under the pie to catch overflow juices. Bake for 30 minutes then reduce oven to 375 F and continue baking until juices are thick and bubbling through steam vent for another 25-30 minutes or until golden browned.

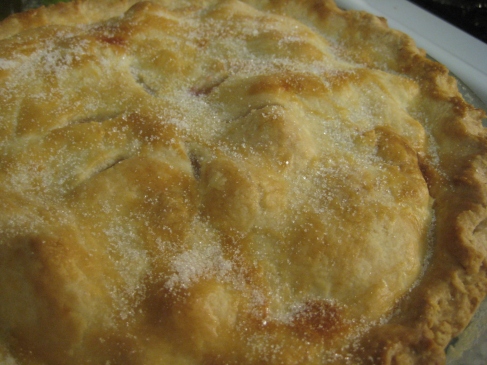
8. Remove pie from oven and let cool completely. Sprinkle sugar over the top and serve with either whipped cream or ice cream.

Image

Image

Cotton Soft Japanese Cheesecake

ImageI remember the first time that I had the cotton soft Japanese cheesecake I was actually really young, probably still in elementary school, from this chained bakery called Miki Ojisan No Mise.  After I had the first bite, I was like this is the best cake I’d ever had in my life!  No kidding just because that was probably the first cheesecake I had and I loved it!  It’s cotton soft and cheesy.  Since then, I would have to beg my sister to buy one home once a month.

However, after I came to US, I rarely see any Japanese cheesecake being sold in bakeries.  I’ve only seen the New York Cheesecake with the crust at the bottom.  Honestly, NY cheesecake and Japanese cheesecake, texture wide, are so much different, and I like the Japanese style better because it’s cotton soft.  I just don’t like the NY style that much with the crust.  I’ve always been looking for a real good cotton soft Japanese cheesecake from the bakeries, but no luck.  So, I just decided to make it myself and bring it to celebrate a friend’s birthday!  =)

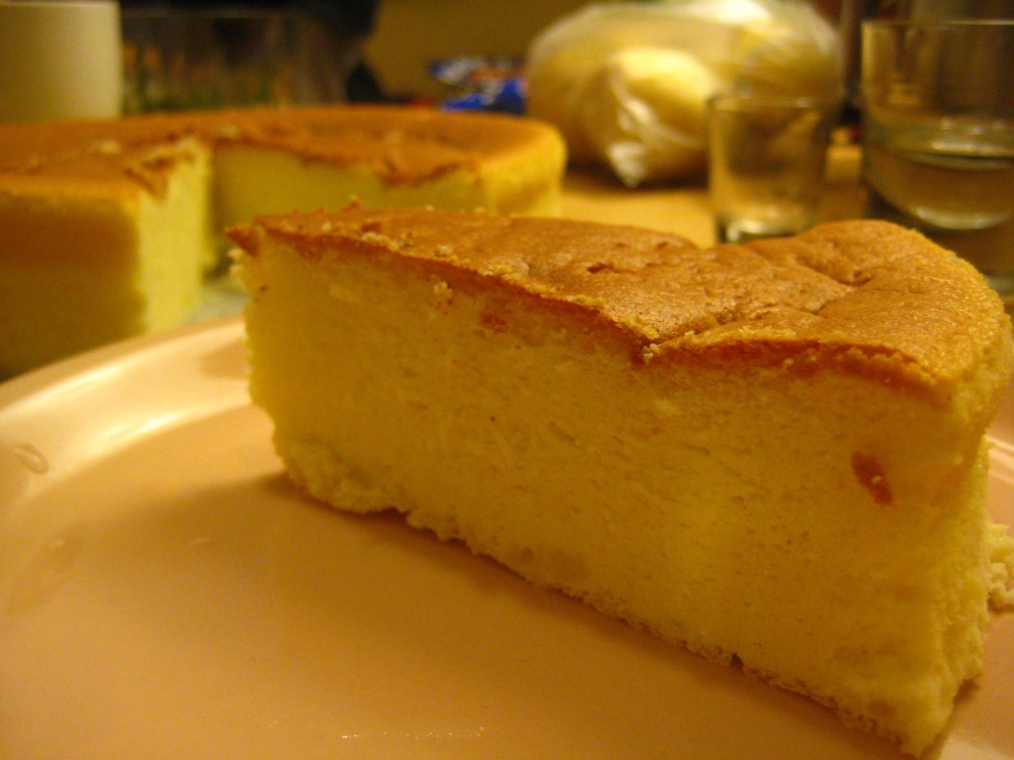
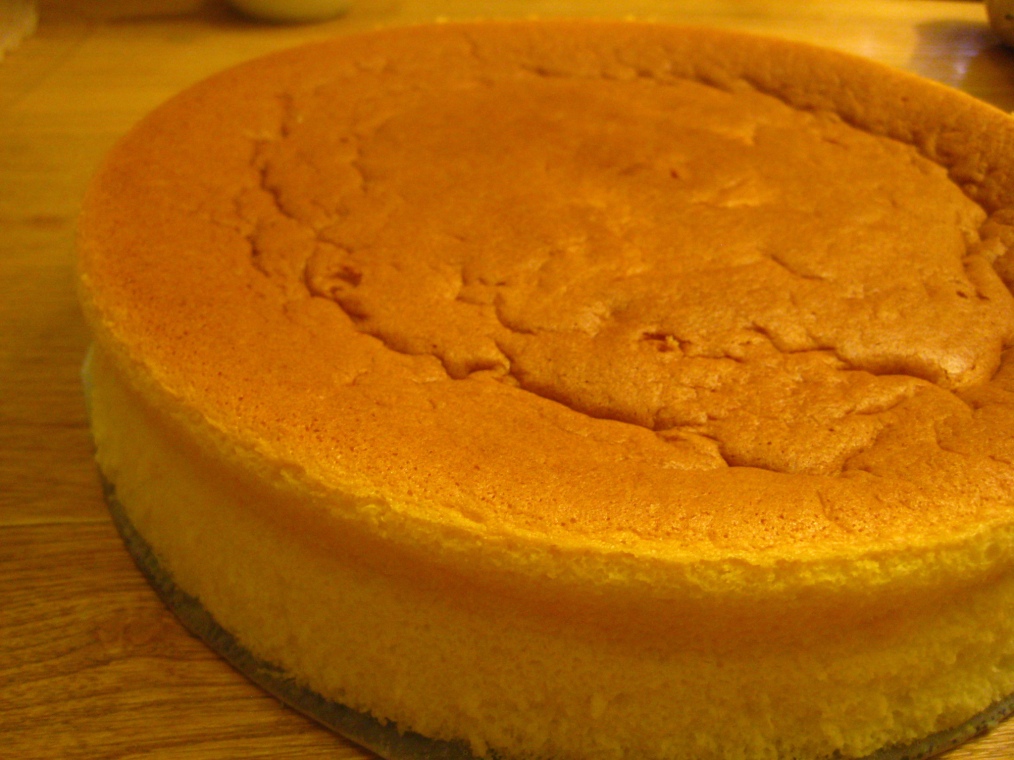
ImageAlthough the top didn’t come out to be a dome-shaped as it got cooled, it was still good.  Next time, I gotta make sure it doesn’t sink like this one.

Ingredients:

-9 oz. of cream cheese, softened

-4 tablespoons of unsalted butter

-1/3 cup of whole milk

-6 egg whites and 6 egg yolks, room temperature

-1/4 teaspoon of cream of tartar

-1/2 cup of granulated sugar

-1/3 cup + 1 teaspoon of cake flour

-2 tablespoons of corn starch

-1/4 teaspoon of salt

Directions:

-Preheat oven to 325 F.

-Melt cheese, butter and milk in a heat-proof bowl over a double boiler.  Stir occasionally to break up cream cheese and combine ingredients.  Remove bowl from heat and cool.  Fold in flour, corn starch, salt and egg yolks, and mix well.

-Beat egg whites with cream of tartar until foamy.  Add in sugar and beat until soft peaks form.

-Add egg whites to the cheese mixture and fold well.  LIghtly grease and line the bottom of a 9-inch springform pan with parchment paper.  Wrap the outside of the pan with heavy duty aluminum foil.  Pour the batter into the pan, and bake in a water bath for 1 hour and 10 minutes or until set and golden brown on top.

-Leave the cheesecake cool in the oven with the oven door ajar, about 30 minutes to 1 hour.  Remove from the oven and let it cool completely on a rack before serving.

Ginger Ice Cream

Image

Can’t believe the last time I updated my blog was in November of 2012! It has been 5 months that I even opened up the page. I’m a bad blogger! Even my foodie buddy had been asking me when would I have new post on my blog, and I couldn’t give him an answer. Now, I really do feel bad!

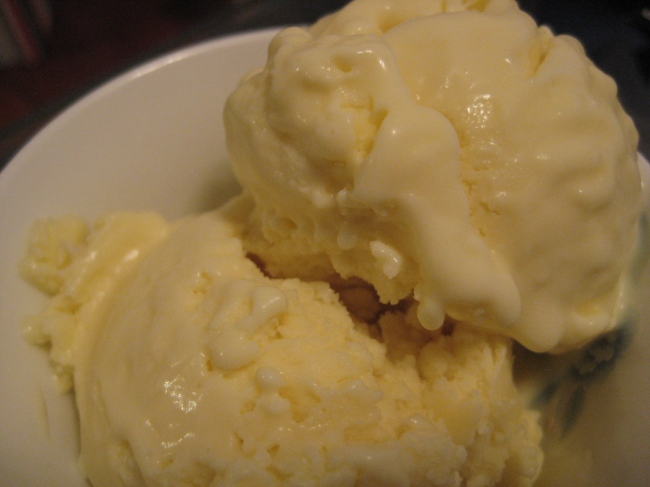
Anyways, I’m back now, and putting up a simple post is a way to re-start my blog again – ginger ice cream. I know not a lot of people are the fans of ginger, but I am. I eat cooked and raw ginger, I drink ginger ale, ginger beer, and boiled coke with ginger when I’m sick. However, I never had ginger ice cream before, so I gave it a try. Couple weeks ago, as my pig, a friend and I were having dinner together, we somehow started to talk about ice cream, and the thought of “ginger” popped up! I wasn’t sure how it would taste, but I wanted to try. It actually came out pretty good! Creamy and gingery, but not overpowered.

Ingredients:

1. 1 cup of whole milk

2. 1 1/2 cups of heavy cream

3. 3/4 cup of granulated sugar

4. 6 egg yolks

5. 1/4 cup + 1 tablespoon of grated ginger

6. Pinch of salt

Directions:

1. In a medium saucepan, combine milk, heavy cream, salt and grated ginger over medium heat until simmered.

2. In a medium bowl, whisk egg yolks with sugar until pale yellow and frothy. Slowly adding warm cream mixture to egg, whisking continuously while pouring.

3. Pour the mixture back to the saucepan over medium low heat. Continue to cook and whisk until it thickens slightly and coats the back of spoon.

4. Pour mixture through fine mesh sieve into a large bowl. Allow mixture to sit at room temperature for 15 minutes. Cover and chill in fridge for at least 4 hours.

5. Pour the cold mixture into an ice cream maker for 25-30 minutes.

Banana Cream Pie

Image

Post Thanksgiving posting means eating a lot posting! So, how did people spend your Turkey Day? Let me guess! Must be eating a lot!!! Well, at least I was.

I don’t usually call it a “Thanksgiving” day because of the history behind this holiday that does’t make me think it was quite thankful. Therefore, I call it a Turkey Day, or some people call it a Fat Day! I like that. It explains a lot that you don’t do anything besides feeding yourself until you’re FAT! Alright, I’m just speaking for myself.

Anyways, I haven’t baked anything in a while, so Turkey Day was the best excuse AND occasion for me to do so. Originally, I was gonna make pumpkin pie because this is the pumpkin season, but when I got to the supermarket and Target on Friday all the canned pumpkin puree had run out! People are just crazy and serious about pumpkin I guess! So, I ended up making banana cream pie for a new comers welcome slash holiday party.

This was actually my first time making pie. I’ve only baked cupcakes, cakes and cookies, but pie….I didn’t want to try it because I always thought it was a lot of work to make a pie. You have to make the pie dough, chill it, roll it out and chill it again, make the filling, and then bake. Doesn’t it sound a lot of work to you? But never mind, I still gotta try to make a pie for once, and so I did! Surprisingly, it actually wasn’t as hard as I thought. Although there were still a lot of prep work, it was fun. And, surprisingly, it was good and people liked it. I guess I would have to make more pies in the future!

Ingredients:

Pie Crust:

1. 1 1/4 cups of all purpose flour plus extra for dusting

2. 1/4 teaspoon of salt

3. 1 teaspoon of granulated sugar

4. 1 stick of cold butter

5. 3 to 4 tablespoons of ice water

6. 1 large egg, lightly beaten

Filling:

1. 4 large egg yolks

2. 3-4 ripe bananas

3. 3 cups of whole milk

4. 2/3 cup of granulated sugar

5. 5 tablespoons of cornstarch

6. 1/4 teaspoon of salt

7. 1 cup of heavy cream

8. 3 tablespoons of confectioners’ sugar

Directions:

1. Mix flour, salt, sugar in a mixing bowl. Quickly cut in butter to the dry ingredients, and use your fingers to crumble the butter cubes with the flour mixture until the mixture has the consistency of wet sand. Add ice water until the dough just holds together. How much water you use depends on the humidity in the air. Form dough into a disc, wrap in plastic wrap and refrigerate for one hour or overnight.

2. Preheat oven to 375 degree. On a lightly floured work surface, roll out dough to a 12-inch round, a bit less than 1/4 inch thick. Fit dough into a 9 inch pie plate. Using a kitchen shears or knife, trim crust so there’s a 1/2 inch overhang all around. Fold under overhang so it extends slightly beyond edge of plate. Crimp edge as desired. Prick dough all over with a fork. Brush rim of dough with beaten egg. Chill pie shell until firm, about 30 min.

2. Line chilled pie shell with round of parchment paper, leaving a 1 inch overhang. Fill with pie weights or dried beans. Bake until edges of crust just turn golden, 25-30 min. Remove pie weights and parchment paper. Return crust to over, and continue baking until golden all over, 20-25 min more. Place pie shell on wire rack to cool completely.

3. Prepare an ice bath, set aside. In a bowl, whisk egg yolks, set aside. Ina saucepan, whisk together milk, granulated sugar, cornstarch and salt. Bring to a simmer and cook, whisking constantly, 3-4 min.

4. Gradually whisk a quarter of hot milk mixture to the yolks. Whisk in remaining milk mixture. Strain into a clean saucepan and cook over medium high heat, whisking constantly until custard is thick and bubbles appear in center, 2-3 min. Transfer to medium bowl and cover with plastic wrap, pressing it directly onto surface to prevent skin from forming. Set in ice bath until completely chilled, about 30-35 min. It can be refrigerated over night as well.

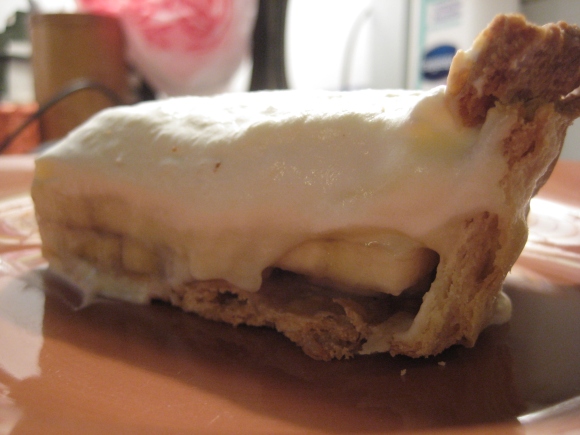
5. Cut 3-4 bananas into 1/4 inch slices. Beginning at the edge of pie crust, arrange the slices in slightly overlapping rows. Cover with custard, using an offset spatula to smooth it into an even layer. In a bowl with electric mixer, combine cream and confectioners’ sugar, beat until soft peaks form. Using a small offset spatula, spread the whipped cream on top of custard. Chill pie, loosely covered with plastic wrap, for at least 1 hour before serving.

Red Velvet Cupcakes with Nutmeg Cinnamon Cream Cheese Frosting

Red Velvet Cupcakes with Nutmeg, Cinnamon Cream Cheese Frosting

I haven’t posted anything onto my blog since the summer started because I didn’t even cook for the whole summer. Why?! Because it’s been too hot to cook or bake at home. It’s been too long that I almost forgot my login name and password! Oops….Anyways, another reason that I didn’t cook or bake for the whole summer is also because I’d been busy too. Today, I finally got to make myself some brunch and bake some cupcakes again. Happy Labor Day!

It’s Labor Day, and it’s long weekend holiday, I think most people are either out of state for vacation or being out with friends, but I’m home baking. Don’t feel bad for me because I actually enjoyed it a lot. Honestly, I hate people….uhhh, maybe I should say, I hate being out there with the crowds, especially on holidays when everyone’s out there partying. I rather just stay home and bake.

I’ve made red velvet cupcakes again. I actually made a post on red velvet cupcakes before, but I decided to remove that old post and put this one up because the pictures are slight…ly better this time, and they came out slight…ly better too!

Usually red velvet cupcake/cake is frosted with cream cheese frosting, but this time I added nutmeg and cinnamon instead because I just wanted to see how this combination is gonna be like. The answer is – pretty good. It’s still cream cheese base, but just adding some ground nutmeg and ground cinnamon to give it more flavors. I actually like this better than the regular cream cheese frosting! Maybe you should try making this frosting for red velvet instead of the regular one.

Ingredients:

1. 1 1/4 cups of sifted cake flour

2. 3/4 cup of sugar

3. 1/2 cup of buttermilk

4. 4 tablespoons of unsalted butter, softened

5. 1 large egg, at room temperature

6. 1 tablespoon unsweetened cocoa powder

7. 1 tablespoon of red food coloring

8. 1/2 teaspoon of vanilla extract

9. 1/2 teaspoon of white vinegar

10. 1/2 teaspoon of baking soda

11. 1/4 teaspoon of baking powder

12. 1/4 teaspoon of salt

Directions:

1. Preheat oven to 350 degree. Line 12 cupcake liners in the cupcake/muffin pan.

2. In a medium bowl, sift together cake flour, cocoa powder, baking powder and salt. Set aside.

3. In a mixing bowl, beat butter and sugar with hand mixer until light and fluffy, about 3 minutes. Add egg and beat until combined. Add vanilla extract and beat until combined.

4. Combine buttermilk and red food coloring. With low speed, add flour mixture and buttermilk to butter mixture alternately in additions, by starting and finishing with the flour mixture. Do not over mix!

5. Combine baking soda and vinegar. Mix well and fold into the batter quickly.

6. Divide batter evenly into the each liner to about 2/3 filled. Bake for about 17-22 minutes. Test with toothpick inserted comes out clean. Remove from the oven and let it cool completely on a wire rack.

Nutmeg Cinnamon Cream Cheese Frosting Ingredients:

1. 8 oz. (1 package) of cream cheese, softened

2. 4 tablespoons of unsalted butter, softened

3. 1 teaspoon of vanilla extract

4. 1/4 teaspoon of almond extract

5. 1 cup of powdered sugar

6. 1 teaspoon of ground nutmeg

7. 3/4 teaspoon of ground cinnamon

Directions:

1. In a mixing bowl, beat cream cheese, butter, vanilla extract and almond extract until smooth.

2. Gradually add in powdered sugar and mix until fully incorporated.

3. Add in nutmeg and cinnamon, then increase speed to high and mix until light and fluffy.

4. Ready to frost when the cupcakes are completely cool.

Spicy Andalusian Seafood Paella

Spicy Andalusian Seafood Paella

I can’t say that I’m a BIG fan of Spanish food, but I do like Spanish food; I can’t say that I’m a BIG fan of seafood paella, but I do like seafood paella. When you go to an authentic Spanish restaurant, you mush not miss one of its famous dishes – seafood paella, if you like seafood and rice.

Couple weeks ago, I was craving for some seafood and rice dish, so I went online and tried to find some recipe of paella. However, I found Creole jambalaya. It’s kinda similar to paella, so I made jambalaya instead. It wasn’t a big of a success. It was tasty, but the rice wasn’t fully cooked through probably because of the kind of rice that I used, or the pot that I used. I wasn’t sure. Regardless, it was still pretty tasty.

This week, we had guest coming for dinner, and I heard that he likes to eat seafood paella, so I made that. This time, I made sure that I had all the right ingredients and tools that I needed for the paella, so then I wouldn’t be embarrassed by the uncooked rice again! Plus, thanks to my colleague for the expensive saffron that he gave me for free! 🙂 The whole thing came out perfectly yummy!! But, I gotta say, I hate making seafood dishes, especially with shrimps and clams! Every time I made shrimps and clams, I gotta spend a lot of time and energy to clean them. I gotta make sure that I clean out the shrimps; I gotta make sure that I brush the clams and make them spit out the sand. Gosh, too much work! Oh well, as long as the dish tastes good, I guess everything that I’ve done to make that happen is worthy.

Ingredients:

1. 1 tomato, diced

2. 1/2 cup of white wine

3. 1 yellow onion, chopped

4. 12 black mussels, cleaned

5. 1/2 cup of extra virgin olive oil

6. 1/2 yellow onion, finely chopped

7. 2 Italian sausage, cooked ahead and sliced

8. 2 roasted peppers, chopped

9. 1 teaspoon of cayenne pepper

10. 1 cup of paella rice

11. 1/2 teaspoon of saffron threads

12. 2 cups of chicken stock, heated

13. 12 extra large shrimps, cleaned and unpealed

14. 12 little neck clams, cleaned

15. 1 handful of parsley, chopped

16. 1/4 cup of fresh lemon juice

17. 1/2 teaspoon of salt

18. 1/4 teaspoon of freshly ground pepper

Directions:

1. Heat wine and onions in a saucepan over high heat. Add mussels, cover and cook for 5 minutes

2. Remove from heat, discard any unopened mussels, and drain, reserving the liquid to use later.

3. Heat oil in a large paella pan, if you have one. I used a regular medium size skillet and it worked fine too. Add extra onion, sausage and cook for 5 minutes or until softened.

4. Add chopped tomatoes, roasted peppers, cayenne. Season with salt and ground pepper.

5. Stir in the reserved liquid, then add rice and stir again. Blend saffron with the chicken stock and stir into the rice. Bring to a boil, then reduce heat to low and simmer, uncovered, for 15 minutes without stirring.

6. Put shrimps, clams on top of the rice. Push them into the rice, cover and cook over low heat for 10 minutes. Add mussels and lemon juice for the last 5 minutes to heat through. If rice is not cooked, add extra chicken stock and for a few more minutes.

7. Leave to rest for 5 minutes, then add parsley before serving.


Sausage Mushroom Pizza

Sausage Mushroom Pizza

I used to love pizza a lot when I was in Malaysia, especially the one from Pizza Hut. My friends and I would go there every other Saturday, and I never got sick of it, until I got to NY. Who doesn’t know that there are pizzerias at almost every corner of the streets in NY? Eating pizza in NY is actually a very common thing. Because it’s way too common here, I’ve become so sick of it to a point that pizza has down to the very last option on my food list! I will not have pizza unless there’s really nothing around me that I can eat!

So, this is my experience with pizza. However, after trying to make bread last time, I kinda wanted to try making pizza from scratch. So, I went online to look for the recipe, and went on Youtube to see how people make the dough from scratch. It was fun! Well, it seemed fun and easy to watch people making it! Anyways, I tried to make my first pizza from scratch last week. It was a hot mess! Ok, at least the first half of the process was easy. I could totally handle that. Now, the second half of it, HOT MESS! I was having hard time to stretch the dough with my hands and fists. It was either too thin that it broke or too thick at the end. So, it didn’t come out great. The crust was thick and the toppings was too little. I should’ve put more toppings on it.

Ok, fine! That was my first attempt. But, you know what, I wanted to give it a second try, and I wanted to make sure it came out good! Since I have all those left over ingredients from last time, so I was just gonna make the same pizza. Again, the first half of the process was totally fine. Second half of it, it was….not bad, at least it was much better than the first time. I still tried to stretch the dough, but it was still kin..da not successful. So, I decided to “cheat” a little bit by using a rolling pin to roll it out. Of course, if you’re confident enough to use your fists to stretch it, do it! Yes, it came out successfully! Much thinner crust, much more cheese and toppings, and tasted much better too! Yummm!

Ingredients:

Dough:

1. 1 1/2 cups of warm water, around 110-100 F.

2. 1 teaspoon of salt

3. 1/3 cup of olive oil

4. 4 cups of flour

5. 1 package of active dry yeast (2 1/4 teaspoons)

Toppings:

1. 1/4 cup of marinara sauce

2. 8 oz. of mozzarella cheese, sliced

3. 1 Italian sausage, sliced

4. 1/3 cup of mushrooms, sliced

Directions:

1. Pour yeast over warm water in a small bowl and let stands for 10 minutes.

2. In a mixing bowl, add flour, salt and mix. Add olive oil and using dough hook and mix for about a minute.

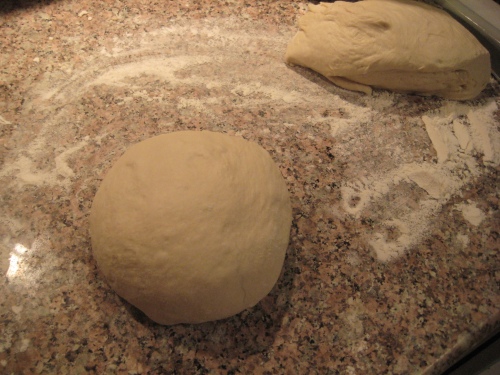
3. Add the yeast mixture to the flour mixture and mix until well incorporated. Turn the dough onto a clean work surface dusted with flour and start to knead the dough until smooth. Shape the dough into a ball and place it in an oiled bowl, rubbing oil on the dough as well. Cover the bowl with plastic wrap and let it rise at room temperature for 1 hour, or refrigerate overnight.

Ready to turn it onto a clean floured surface for kneading

Knead until smooth and shape it into a ball. Place it into an oiled bowl and let it rise.

4. Preheat oven to 500 F.

5. Remove the dough from bowl and turn it onto a clean floured surface. Use a knife and cut it into half. Take one half and shape it into a ball before rolling it. Roll the dough or stretch it with your fists to about 1/8 inch thickness. Transfer the dough to a floured baking sheet and shape it into 9″ x 13″ rectangle.

Cut in half, and start working it

Place it on a baking sheet

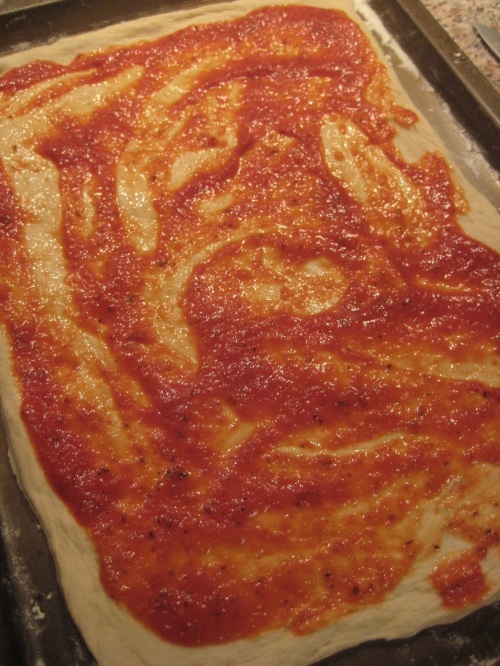
6. Spread marinara sauce over the dough. Place slices of mozzarella cheese, and then sausages and mushrooms.

Spread with marinara sauce

Start placing the toppings

7. Bake for about 15 minutes.

Enjoy!

Cinnamon Buns

Cinnamon Buns

I love going to Ikea; I love looking at their furniture; more excitingly, is when I get to the check out section and smell the cinnamon buns from the exit cafe. I’ll get really excited every time I smell the cinnamon buns, and of course, will go buy one whole pack with 6 of them! At that moment, I care nothing about the furniture and whatever items I’ve bought, all I want is to have a bite, or all 6 of the cinnamon buns! Am I crazy? I hope not!

Last time I had cinnamon buns was…month or couple months ago, and last week, I had a really strong crave for it. Well, every month I sure have some strong crave for certain sweets, and this time cinnamon buns just popped up in my head from nowhere. Last Friday, my crave got stronger and stronger after dinner, so I started to look for what I had at home to see if I had all of the ingredients that I needed to make cinnamon buns. Fortunately, I had everything that I needed at home because it was already 11pm. If I didn’t have all the things that I needed, then I would have to wait until the next day to buy the ingredients and make them. Making the cinnamon buns actually took me a long time, from 11 – 3 in the morning. Yes, I was that crazy for it! Actually, I had a choice to bake the buns next morning, but I chose to wait for the dough to rise for another hour and bake them right away instead. And, I got to eat it right after the buns came straight out from the oven. Warm, soft and sweet! Mission had accomplished! I was a happy little girl again!

Ingredients:

Dough

1. 1 package of rapid rise yeast

2. 3/4 cup of whole milk, warmed (110 degree F)

3. 1/4 cup of sugar

4. 4 eggs

5. 4 1/2 cups of all-purpose flour

6. 1 1/2 teaspoons of salt

7. 6 tablespoons of unsalted butter, room temperature, cut into chunks

Filling

1. 3/4 cup of brown sugar

2. 3 tablespoons of ground cinnamon

3. 1 egg + 1 teaspoon of water for egg wash

Frosting

1. 1/2 package of cream cheese, softened but still cold

2. 1/2 stick of unsalted butter, room temperature

3. 1 cup of confectioners’ sugar

4. 1 teaspoon of vanilla extract

Directions:

Dough

1. In a mixing bowl, mix flour, salt and yeast together. Add in warm milk, eggs and sugar. Attach the dough hook and knead on low speed until all ingredients come together. Toss in the butter and continue to knead until dough is smooth and springy, about 7 minutes.

2. Lightly butter a large bowl. Form the dough into a ball, and put it into the buttered bowl and cover tightly with plastic wrap. Let the dough rise at room temperature until it doubles for 1 and half to 2 hours.

3. Butter a 9″ x 13″ baking dish and line with parchment paper, then butter the parchment paper.

4. After the dough has doubled, punch it down and place it on a lightly floured surface. Cut the dough in half. Roll out 1 half of the dough into a rectangle about 9″ x 14″. Mix brown sugar and ground cinnamon in a bowl, spread half of the cinnamon mixture onto the dough evenly. Starting at the long side closest to you, start pinching and rolling the dough and form a log. Cut the log into 8 equal slices. Arrange slices in the pan, 4 across. Repeat the same process with the other half of dough.

Dough had doubled, and ready to roll the dough

Spread evenly with cinnamon mixture

Roll into a log

Slices had rose and ready to be baked

5. Cover the pan with plastic wrap and place in fridge overnight. Next morning, take the out of the fridge and let it stand at room temperature for 45 – 60 minutes. OR, like what I did, if baking right away, let it stand in a warm place for about an hour.

6. Heat the oven to 400 F. Brush the buns lightly with egg wash. Bake until golden brown, about 20 minutes.

7. While baking, in a mixing bowl, cream together the cream cheese and butter. Add in confectioners’ sugar, blend until creamy. Add in vanilla extract.

8. Take the pan out of the oven, and let the buns cool for 5 minutes. Spread the frosting on them.

Spread with frosting, and ready to eat!